ivre黑客搜索引擎


简介
IVRE(又名DRUNK)是一款开源的网络侦查框架工具,IVRE使用Nmap、Zmap进行主动网络探测、使用Bro、P0f等进行网络流量被动分析,探测结果存入数据库中,方便数据的查询、分类汇总统计。
IVRE官方网站:https://ivre.rocks
GitHub:https://github.com/cea-sec/ivre
安装
使用pip安装
pip3 install ivre这里开始使用python3来安装
安装mongodb
数据库是必须要安装的,在ubunt上安装mongodb的方式可以参考如下链接:
https://docs.mongodb.com/manual/tutorial/install-mongodb-on-ubuntu/
大概的过程如下:
Import the public key used by the package management system.
sudo apt-key adv --keyserver hkp://keyserver.ubuntu.com:80 --recv 0C49F3730359A14518585931BC711F9BA15703C6Create a list file for MongoDB.
echo "deb [ arch=amd64,arm64 ] http://repo.mongodb.org/apt/ubuntu xenial/mongodb-org/3.4 multiverse" | sudo tee /etc/apt/sources.list.d/mongodb-org-3.4.list操作系统是ubuntu 16.04LTS
Reload local package database
sudo apt-get updateInstall the MongoDB packages.
sudo apt-get install -y mongodb-orgstart mongodb
sudo service mongod startconfigure
具体的配置方法可以参考如下链接:
https://github.com/cea-sec/ivre/blob/master/doc/INSTALL.md
可以只修改/etc/ivre.conf,增加如下内容:
GEOIP_PATH = "/usr/local/share/ivre/geoip/" DB Creation
按照下面的步骤操作即可:
$ ivre scancli --init
This will remove any scan result in your database. Process ? [y/N] y
$ ivre ipinfo --init
This will remove any passive information in your database. Process ? [y/N] y
$ ivre ipdata --init
This will remove any country/AS information in your database. Process ? [y/N] y
# ivre runscansagentdb --init
This will remove any agent and/or scan in your database and files. Process ? [y/N] y
注意要配置上面的GEOIP_PATH,否则后两条命令执行失败
Get IP Data
# ivre ipdata --download
$ ivre ipdata --import-all --no-update-passive-db
到此理论上已经可用了,为了获得可视化的效果,下面配置web server
web server
docker版本的ivre已经配置好了web server, 拿来直接用就可以了。因为这里使用ubuntu配置的,需要自己修改配置文件。本地用的nginx作为web服务器。
修改配置文件
将如下连接的配置文件复制到/etc/nginx/sites-enabled里面重新启动nginx即可,注意不能和其他的server端口重复了。
https://github.com/cea-sec/ivre/blob/master/docker/web/nginx-default-site
这样配好之后可以打开页面了,但是看不到动态的数据。
配置fastcgi
安装fastcig
apt install fcgiwrapconfig fastcgi
cp /usr/share/doc/fcgiwrap/examples/nginx.conf /etc/nginx/fcgiwrap.conf至此基本上可以使用ivre的主动扫描功能了。按照如下两个步骤,就可以通过本地页面看到扫描结果了。
$ ivre runscans --routable --limit 1000完成之后执行如下命令:
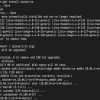
$ ivre scan2db -c ROUTABLE,ROUTABLE-CAMPAIGN-001 -s MySource -r \
> scans/ROUTABLE/up
在页面上看到的结果如下:

ivre.jpg
安装过程中碰到的问题。
MacOS上的安装
MacOS和ubuntu的安装有一些差别。
mongodb和nginx可以通过brew来安装,nginx的配置文件安装好之后是放在/usr/local/share/etc/nginx目录下面的。这个熟悉MacOS系统的都知道。
这里重点说一下fcgiwrap的安装
MacOS下使用fcgiwrap
首先需要先安装fastcgi和fcgiwrap,这个通过brew就可以安装了,
brew install fcgiwrap.安装好之后并不能直接用,需要做一些配置,可以参考如下的页面:
https://www.nginx.com/resources/wiki/start/topics/examples/fcgiwrap/
这里大概说一下步骤:
先创建一个perl脚本,内容如下:
#!/usr/bin/perl
use strict;
use warnings FATAL => qw( all );
use IO::Socket::UNIX;
my $bin_path = '/usr/local/bin/fcgiwrap';
my $socket_path = $ARGV[0] || '/tmp/cgi.sock';
my $num_children = $ARGV[1] || 1;
close STDIN;
unlink $socket_path;
my $socket = IO::Socket::UNIX->new( Local => $socket_path, Listen => 100,
);
die "Cannot create socket at $socket_path: $!\n" unless $socket;
for (1 .. $num_children) { my $pid = fork; die "Cannot fork: $!" unless defined $pid; next if $pid; exec $bin_path; die "Failed to exec $bin_path: $!\n";
}
注意: 这里的my $bin_path = '/usr/local/bin/fcgiwrap'; 要替换成实际的fcgiwrap程序的位置。另外my $socket_path = $ARGV[0] || '/tmp/cgi.sock';中的/tm/cgi.sock要和前面配置的fastcgi的socket保持一致。
这样执行完上面的脚本之后会发现在/tmp目录下多了一个cgi.sock文件。这个就是一个unixsocket。
这个时候可能还是不能访问,打开nginx的日志会发现,cgi.sock没有权限,简单的方法就是将cgi.sock的权限修改成777.然后就OK了。
python版本号的问题
ivre中的geoiputils.py用了strip(b'/n')这样的字符,导致在python3中运行出错。使用python2.7运行是OK的。
使用nginx的问题
需要安装fastcgi, 不然不能获取到存储在数据库中的扫描结果。
后续打算
ivre其实就是一个扫描的框架,将一些扫描的消息进行可视化展示。因为没有安装neo4j,flow方面的可视化展示目前也做不了。后续还有一些简答的实验要做:
- 1 装上neo4j和bro,通过被动模式监控本机的流量。
- 2 实验更多ivre的主动扫描功能。