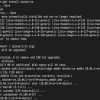
python auto send email利用python自动发送邮件或把nmap扫描结果发送到邮箱


version1.1 auto_send_email.py
- #!-- coding: utf-8 --
- #send ok but only same 163email adresse
- import smtplib
- from email.mime.text import MIMEText
- from email.header import Header
- import json
- #邮件发送类
- class EmailManager:
- def __init__(self,user,psw,sender):
- self.user = user
- self.psw = psw
- self.sender = sender
- self.host = "smtp.163.com"
- def sendEmail(self,receivers,content,title):
- message = MIMEText(content,'plain','utf-8')
- message['From'] = "{}".format(self.sender)
- message['To'] = ",".join(receivers)
- message['Subject'] = title
- try:
- smtpObj = smtplib.SMTP_SSL(self.host,465)
- smtpObj.login(self.user,self.psw)
- smtpObj.sendmail(self.sender,receivers,message.as_string())
- print("mail sender successfully!")
- except smtplib.SMTPException as e:
- print(e)
- if __name__ == "__main__":
- with open("send_email_config.json","r") as f:
- jsonstr = json.load(f)
- EmailManager = EmailManager(jsonstr["user"],jsonstr["psw"],jsonstr["sender"])
- EmailManager.sendEmail(["lvwuwei@163.com"],"from yann message","message bla bla")
下面是发送邮件的json配置文件
send_email_config.json
- {
- "user": "h4ckg3h2y1@163.com",
- "psw": "XxxxxAxxxGxxxxCQ",
- "sender": "h4ckg3h2y1@163.com"
- }
配置163邮箱的smtp的授权码和发送者邮件
version 2 code for demande